

Need to change your timing belt? Pro Street Timing Belt Kits
We take a look at how to service your timing belt on your D series / SOHC motor. Today we are revising our writeup on this 1993 Honda Del Sol, equipped with a D16Z6. If your engine has reached the mileage required, it’s time for the D16Z6 SOHC Timing Belt to be changed.
So grab your tools and let’s get started as we show you how to change your D16Z6 SOHC Timing Belt.
The Del Sol in question :

The SOHC D16 motor in question, remove all your ignition wires and set them to the side in preparation.

With the ignition wires set to the side, you can begin your work.

disconnect the ground on the battery:

Loosen the valve cover bolts. Just a pointer, these bolts are very weak and should be loosened and tightened with care!

A picture with the bolts loosened in order to remove the valve cover:
Your valve cover may be a little tough to remove and may require a dead blow or small hammer to gently tap the sides of the valve cover to break it loose. You can also use a small screwdriver as we did to pry up one side of the valve cover, but take care not to crack or damage any plastic guides or parts around the timing belt.

Now with your valve cover removed, remove the 10mm bolts holding the top of your timing cover on and expose your timing belt and cam gear.

Now is a good time to drain your coolant, as you don’t want it dumping all over the front of your SOHC motor when your water pump is removed. Undo the top radiator cap and loosen your radiator petcock.

Use extreme caution when undoing your radiator cap, contents in the radiator and cooling system are most likely pressure charged and very very hot.

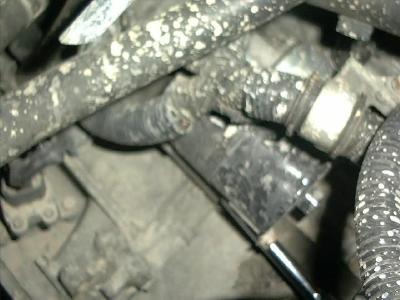
If your vehicle is equipped with powersteering, you may or may not opt to remove or at least loosen the pump and assembly as it will allow you greater space and room to access your timing belt spring. Loosen the wingnut tensioner and lower the bolt, then undo the 12mm bolts holding the assembly to the bracket attached to your motor.

If the vehicle is equipped with AC, you will need to loosen the AC pulley which is next to the AC bracket on the underside of your passenger frame rail. This is done by loosening the 10mm long bolt which is way down in there (on the bracket), and also loosen the 14mm pulley bolt to loosen the belt. Remove the belt from there.
You WILL need to also remove the two bolts pictured here to remove the AC compressor belt:

This car has cruise control. So this will also need to be removed. Pictured here is the ratchet removing the THREE 10mm bolts that hold the cruise control box to the chassis:

Next thing is to remove the alternator belt. Pictured here is the loose 12mm bolt that holds the tension on the alternator belt.

Another shot of the 14mm bolt in question that must be removed to access said belt to access the rear areas.

Now, to break loose the crank pulley. This can be done a multitude of ways, but if you do not have power tools / air tools, you may need either a huge breaker bar with a very large friend, or simply purchase a Moroso crank tool, part number 61040.
This is a tough part of our D16Z6 SOHC Timing Belt change, if you do not have air tools you may be stuck here.

Using a large breaker bar like this will allow you to crack loose that pesky crank bolt and free things up.
We have also taken the liberty to show you how to remove your crank bolt if it’s just being a bitch or refuses to crack loose. The next easiest step is to remove the starter and access the flywheel and teeth to the flywheel.
By using a large pry bar or flathead, you can wedge the teeth against the case of your transmission, preventing the crank from rotating. Use extreme caution here as to not break or crack anything that may slip down into the hole that held your starter previously. Now remove your crank bolt and the harmonic dampener / crank pulley attached.

USE EXTREME CAUTION WHEN REMOVING CRANK PULLEY AND CRANK KEYWAY. There is a small piece of metal that is called the keyway that helps guide the crank pulley onto the snout of the crank, and prevents movement. DO NOT LOSE THIS PART.
Next thing. You need to remove the driver side mount in order to remove the timing belt (since it goes around):
Next brace the engine and oil pan using a large 2×4 or mount to prevent the oil pan from crushing or denting, or causing any damage to your oil pickup tube. Using this braced jack, slowly raise the motor until you can completely remove the engine mount.

Next thing is to remove the LOWER timing cover. This is held by a 5 10mm bolts, with one just near the motor mount that may be tricky to get to. Because you can lower and raise the motor as you wish, this should be relatively straightforward.
Next thing, LOOSEN the tensioner pulley. This is a 14mm bolt:

Next, remove the timing belt from the cam gear:

Next thing, remove the water pump. There is FOUR 10mm bolts that are holding this on and get ready for the splash

Make sure the 14mm bolt holding the alternator bracket on is removed before you take your water pump off.

Coolant should be everywhere now, clean up a bit and try to dry the area where your new water pump will mount.

Now, prep your new water pump using Hondabond or a high temp RTV sealant. We’ve included some measurements to ensure the water pump you receive is the correct one.


Now install your water pump, and secure with the 10mm bolts but do not replace the 14mm bolt just yet to the alternator bracket. Now slide on your replacement timing belt and let’s start setting your engine timing.
Set your engine to TDC

Install the CRANK pulley, and put the crank pulley bolt on, make sure you have that keyway installed correctly. At this point, the crank pulley does not need to be torqued, but just enough to spin the motor.
Once that is installed, turn the CRANK to TDC (make sure you keep the cam gear at TDC pictured above).

As you can see in the picture, you must align the hashmarks of your crank pulley to the lower timing guide of your vehicle.
Again, make sure the cam gear is at TDC:
As your motor spins clockwise, you must make sure there is ZERO slack from the back of the cam gear to the back of your crank. Now take the slack ( however small that may be ) and slide it around the new tensioner pulley with your timing belt spring ready to latch onto the pin. From there set your tension using a large flathead or breaker bar, and while applying said pressure snug the 14mm bolt holding your tensioner in place. DO NOT OVERTIGHTEN.
Now, for the most crucial part of the install. CHECK and DOUBLE CHECK your timing by rotating your engine assembly, make sure you do this multiple times and have someone double check your work. Make sure you go overboard when it comes to checking the timing marks on your D16Z6 SOHC Timing Belt.
Install everything as pictured (put timing cover back on, install engine mount, lower the jack, etc..:
At this point, torque the crank pulley bolt to 130 ft lbs with small dabs of anti-seize on the threads of the bolt.
If you have air tools, you are pretty happy right now. If you do NOT have air tools, take a break and have a beer because this will be the hardest part of the install for you.
Install the Power steering belt, put a/c belt back on, put alternator belt back on, make sure they are all tensioned up properly, and bolts are tight (as explained above).
From there, make sure EVERYTHING is torqued, spark plugs are connected, and of course, re-connect the battery.
Did you need a writeup, How to or article on the D16Y8 SOHC Timing Belt? Check here.
- Pro Street Staff
- www.prostreetonline.com
- 1-888-776-7022


 🔥")


[…] How To Change your D16Z6 Timing Belt […]
Would this apply to 1992-1995 Honda Civic DX? I was wondering..
Hi Jorge yes it will! The parts will be slightly different but the SOHC D16 timing belt procedure stays the same! Thanks for commenting!
I just did my del sol timing belt and it snapped on me last week . Everything was ok I put my new timing belt on and now I have very little power I believe iam a tooth off . From timing. Has anyone used a timing gun on there’s.
Hi Jonny, thanks for reading.
Unfortunately it does sound like you are a tooth off.. try timing your engine to see if your timing marks are off or not but really if you are a tooth off on a SOHC it should be very obvious.. Try taking off the belt and lining it up again.
Thanks for commenting!