

In Part 1 of our How To Tune series, we’ll be focusing on tuning the closed loop portion of your fuel map in your vehicle’s ECM / PCM. We’ll be assuming that you are following along with our Haltech How To, but this writeup applies to you even if you are using something as simple as a Super AFC.
Closed loop operation refers to the state where the ECU or PCM takes the inputs from the oxygen sensors ( 02 ) and tries to reach a stoich air fuel ratio. The stoich air/fuel ratio refers to how much unburnt fuel per measurement of air is being passed through the exhaust system.
This process allows your car to maximize gas mileage, while keeping your spark plugs clean and your oil uncontaminated.
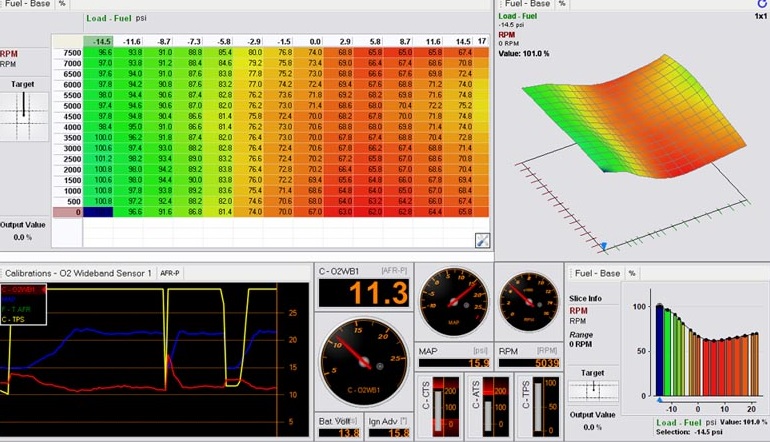
Reading this How To and applying it to use in your vehicle will be difficult if you do not have a wideband air fuel sensor placed inline of your exhaust. A narrowband 02 sensor that reads from 0-1 volts will not suffice here, as it lacks the granularity for you to properly tune.

By referencing the oxygen sensor itself, most standalone computers have the capability to self tune or self learn. In effect duplicating the stock ECU or PCM functions, but now you hold the keys to the fuel settings themselves.
Depending on what standalone Haltech unit you are using, or what piggyback computer will dictate how to properly tune your closed loop control. So get ready to learn How To Tune Closed Loop Control, and leave us a comment if you have any questions.
When using a piggyback
You will need to keep three factors as consistent as possible when tuning for closed loop control, that’s RPM, Engine Load and throttle position. Because most piggybacks are not inherently intelligent, it’s up to the tuner ( that’s you ) to properly input the values to maximize gas mileage and decrease emissions.

When using a product as limited as a piggyback or Super AFC, the important thing to keep in mind that your corrections must be based on the three factors being as close to the same as possible. After all, you are already trying to hit a moving target, if a safe environment cannot be located like a chassis dyno for you to tune, try a large open road to tune closed loop.
Tune for the RPM range in question, and try your best to have the driver hold the throttle, load and rpm at steady presets as you attempt to hit stoich. Move on slowly and steadily, until you have tuned out the complete rpm range.

Try to duplicate many driving situations as possible, for example fifth gear at cruising speed and around town at part throttle. Try to keep your air fuel measurements as close to stoich as possible.
Using items like piggyback computers will help you get things under control, but it’s only a matter of time before your ECU corrects your corrections. Use a datalogger to reference your long term and short term fuel trims, and reset your ECU if they are too far out of whack.
For more information on long term, short term fuel trims, click here for our article.
When using a standalone
Depending on the type of standalone you are using here, we’ll be addressing the Haltech but these steps are similar for many other units. Remember that your goal is to measure the voltage of the oxygen sensor and determine how much correction is needed to reach stoich.

Here is a checklist of parameters to check during your process of tuning your vehicle for closed loop operation.
1. Lower RPM Limits – Also called the Lower RPM threshold
The engine must be running above a certain RPM for the closed loop operation to work. This should be set a few hundred rpm above the stock idle, without any mechanical idle adjustments.
2. Upper RPM Limits – Also called the Upper RPM threshold
You aren’t going to want closed loop control at any time under serious load. It’s meant for transportation and emissions control, not for racing. So it makes sense to put a glass ceiling on your closed loop operation and set this rpm to 3/4 of your total rpm range.
3. 02 Sensor threshold voltage – also called 02 sensor trigger point
This value in your Haltech or standalone refers to the voltage by which the ECU will determine if the engine is lean or rich. This is normally set to stoich or as close to 14.7:1, or if you have specific a/f targets now is the time to adjust this value.
4. Maximum fuel increase / decrease – Fuel adjustment threshold
You are going to want to set limits to how much the standalone can correct in your closed loop control. This base value is usually set within 5 to 12% depending on your fuel type. Remember to set these values to prevent your ECU from adjusting the fuel injection time outside of your desired ranges.
5. Idle 02 sensor threshold
A seperate value for idle performance only, this value allows you to tune your closed loop control properly while entering a preset idle air fuel target. Typically the engine will require more fuel for cruise over idle, so this value is imperative to your goal.
6. Engine cycles at idle – Engine idle speed
This value is one that should not be adjusted unless you know what you are doing. Exhaust gas transportation time is much higher at idle speed, and this value will delay the reading if you are operating closed loop during idle conditions.
Oxygen Sensors and you.

Most standalone computers will have provisions for narrowband and wideband 02 sensors, be sure to use a good 4 wire 02 sensor if a wideband is not an option. Beware of cheaply made 02 sensors or 3 wire or 1 wire 02 sensors that may not transmit accurate information to your ECU fast enough.
Remember, You are only as good as your sensors are as a tuner.
This does it for our first chapter on How To Tune your performance vehicle. Stay tuned for our next chapter on tuning wide open throttle and hitting the dyno running.


[…] Read our primer on How To Tune Closed Loop operation, found here. […]
[…] For more information on how to tune closed loop operation, check out our How To Tune Closed Loop Operation here. […]
[…] on what venting to atmosphere does on a mass air flow equipped turbocharged vehicle, check out our How To Tune […]
[…] WOT. Success with the Super AFC NEO is unquestioned but we’ve still had our share of tuning closed loop control issues. Our How to Install page is a good place to start, but many SRT-4 owners do not want the […]
[…] cause direct damage to your piston rings because of excessive fuel pressure that your ECU’s closed loop cannot control. For more information on closed loop operation and how it affects you and your car, […]
[…] Your PCM uses this information to operate closed loop operation and run your engine efficiently. For more information about tuning and closed loop, or what closed and open loop mean or do for your vehicle, check out our primer here. […]
[…] How to Tune Closed Loop […]
[…] this code is triggered during a drive cycle, the chances of your LFX engine running lean during closed loop operation is high. Most of the time this issue can be traced to a leaky intake boot or vacuum leak that is […]
[…] that can arise from a faulty thermostat, from P0125 Mitsubishi Insufficient Coolant Temperature for Closed Loop operation, to P0128 or […]